Sunday, January 30, 2022

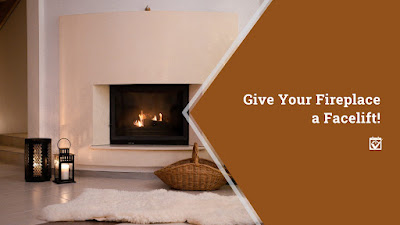
Give Your Fireplace a Facelift!


Give Your Fireplace a Facelift!

Give Your Fireplace a Facelift!


If you have a fireplace in your house, it’s going to draw the attention of anyone who walks into the room where it’s located. This is fine if you want your fireplace to be a focal point, but if it’s less than impressive, you might want your guests looking pretty much anywhere else. Even if there aren’t any significant issues with your fireplace, you may not like the way that it fits in with the rest of your furnishings. Is there anything that you can do?

Yes, actually, there are several ways that you can spruce up your fireplace and get it in the sort of shape that will have you wanting to show it off. While some options may depend on the type of fireplace you have and how you decorate the surrounding room, you should be able to find some way to improve the look of your fireplace that fits your specific situation.

Updating Your Surround

One way that you can really change the look of your fireplace is to make changes to the surrounding materials to update the overall look of the fireplace area. Many fireplaces have a brick surround immediately around the opening, and this brickwork can be covered with tile to significantly change the appearance of your fireplace. Textured and patterned tiles are especially useful when trying to change the look of your fireplace surround. Updates can be made to the tile inside the fireplace as well, so long as appropriately heat-safe and fire-safe materials are used.

Wood molding and other decorative accents can be placed around the surround as well to further change the look of the fireplace exterior. These can help contain the look of the surround and better blend it with the overall look of your room. These accents can also be used to give the fireplace a mantle or other decorative flourishes that it was missing before.

Revitalizing the Room

Making changes to the area immediately around your fireplace isn’t the only way to bring the fireplace front and center in the room. Changes can be made to the rest of the room, which helps to blend the fireplace with the overall decorative design, bringing out colors and textures that might otherwise have seemed out of place. Furniture and decorative items can also be shifted to make them focus more on the fireplace as a central point in the room, allowing guests to face the fireplace and bask in its glow instead of it being hidden in the apparent back of the room.

Other changes can also make a big difference in how well your fireplace fits into the room. Placing a large painting or other decorative item in the wall space above the fireplace helps to make the fireplace seem like a decorative choice. Upgrading your fireplace screen to be more appealing (or adding a decorative screen if you don’t have one) can have a similar effect, while also providing an important measure of safety during periods when your fireplace is in use.

Total Fireplace Makeovers

The suggestions thus far largely assume that your fireplace is in good condition and simply needs some touching up to better fit in. If your fireplace has damaged bricks or tiles, faulty hardware, or is otherwise in need of maintenance, a bit more work is required to revitalize it. Many of the same considerations apply, though, and while you’re getting it repaired, you can make choices that will improve its overall aesthetic while also making it safe.

Wednesday, January 26, 2022

Tips for Flexible Spaces for Kids


Tips for Flexible Spaces for Kids

Tips for Flexible Spaces for Kids

Whether you’re looking to design a bedroom, a nursery, or a playroom, creating a unique space for your children is usually a bigger job than you expect. This is especially true if you want to come up with something that will stand the test of time. The wants and needs of your children will change as they get bigger, and if you don’t account for this, then sooner or later that “perfect” room you designed for your little one will be outdated and possibly even unwanted. Is there anything that you can do other than completely redesign your kids’ rooms every few years?

Fortunately, the answer is yes. By taking the way that children’s needs change over time into account, you can come up with more flexible designs that are easier to adapt even as your child’s interests shift. There will still be periodic changes that have to be made, of course, but this will keep you from having to start from the ground up each time. Here are a few things to keep in mind to help you create some of these more flexible spaces for your kids.

Start Simple

When coming up with the initial design for your child’s bedroom or playroom, it’s a good idea to take something of a minimalist approach to your design. Try to figure out what the absolute essentials are, then see if there is an age-agnostic way to approach them. Add color to the room, but skew a bit more toward light or neutral shades instead of going with brighter or more extreme colors that your child may grow to dislike.

Invest in a few key furniture items that can be repurposed over time instead of buying specialty pieces that will only be used for a short while. Use colored rugs and other removable accents instead of going for changing the carpeting. Your goal is to create a simple space that has a lot of potential, so that as your child’s interests change, you’ll have a base to move back toward and adapt the room from.

Customize the Little Things

Once you have a base design for your child’s room, it’s time to start customizing it to make it appear much more in line with their interests. This is where you can get creative and really try to match the room to your child. Lamps, posters, decorative items, and more can go a long way toward customizing the space while still being relatively easy to remove and replace if your child loses interest over time.

This is also a good time to consider painting furniture items such as desks and dressers. While this may not always be an option, most of the time it’s not that big of a deal to add a coat of paint to simple furniture items to help them better match the look of a room. By painting these accent pieces to match the overall layout of the room, you can make a notable change to the space that can be redone or updated in the future as needed.

Designing with Kids

As your children grow, be sure to get their input periodically so that you can make additional changes that actually align with their interests. This doesn’t mean that you have to rush out and buy everything that your child wants, of course; use these periodic chats to gauge how happy they are with their room, what sort of changes they might be interested in, and if there are any pieces of furniture or decorations that they seem to be outgrowing. The nature of their room is going to change over time, so make sure that they are a part of the conversation on how it needs to change.


Sunday, January 23, 2022

Is It Time for New Cabinets?


Is It Time for New Cabinets?

Is It Time for New Cabinets?

Cabinets play an important part in the functionality of your kitchen. Unfortunately, over time you might find that your cabinets no longer really meet your needs. This could be because they’re falling into disrepair, or it may be a result of you gradually needing more storage than your cabinets can provide. You might even realize that the decoration of your kitchen and surrounding rooms just don’t match your cabinets anymore. Regardless of the reason, it could be time to consider some new cabinets.

Have you actually reached the point where you need to get new cabinets, though? If you aren’t sure, spend a little time considering how well your cabinets truly meet your needs and what it is that you ideally want. Here are a few things to think about to help you make this decision.

Cabinet Condition and Function

One of the biggest considerations when it comes to deciding if it’s time for new cabinets is how well your current cabinets really fit your current life. Your biggest things to think about here are whether the condition of the cabinets is causing you problems, and how well the cabinets actually work for what you need them for. Start with the condition, looking for any damaged areas, doors that won’t close, warped shelves, and other physical problems that you encounter when using the cabinets. If these leave you unable to use some of your space or otherwise cause problems, it may be time to do something about it.

Likewise, if you have certain items that you can’t put in your cabinets because they won’t fit, or if there are parts of the cabinets that you can’t really use due to layout reasons, then you may have an issue with the functionality of your cabinets. Sometimes this isn’t a significant enough problem to replace your cabinets, of course. If using the cabinets is inconvenient or if you have a lot of wasted space, though, something clearly needs to be done.

Cabinet Aesthetics

Even though it’s not as pressing of an issue as damaged cabinets or cabinets that you can’t use fully, having cabinets that don’t match your other furnishings can also be an issue if you’re trying to tie your design choices together. Stop and think about how well your existing cabinets go with everything else, and even whether they are visually appealing in and of themselves. Your home is an investment, and if your cabinets are taking away from your enjoyment of that investment, then it might be time to replace them.

Replacing your cabinets for aesthetic reasons can be a standalone job, or it could be something that you do as part of a larger remodeling project. If you’re only replacing the cabinets, take the time to find a new cabinet option that fits in well with your kitchen layout and the dominant design elements within the kitchen. If you’re doing a larger kitchen remodel and have decided to get rid of your ugly cabinets as a part of it, stop and think about what you want in cabinets and then use that to inform some of your other remodeling decisions.

Do You Need New Cabinets?

Whether or not you need new cabinets is a big decision, but once you’ve weighed your options you should have something of an idea of whether your current cabinets will last you a bit longer. If you do find that you need new cabinets, then finding the right cabinet maker and installer is the next step in your cabinet journey. Fortunately, HomeKeepr can help with this.


Wednesday, January 19, 2022

What Is a Vessel Sink?


What Is a Vessel Sink?

What Is a Vessel Sink?


When it comes to making changes to add a sense of fashion to your home, the bathroom is one of the most commonly overlooked rooms. There is a lot that can be done with the bathroom, though, including painting, adding accent decorations, and changing the various fixtures in the room to completely revamp its look. One option that’s increasingly popular with homeowners is replacing your old boring sink with a vessel sink.

While these sinks aren’t right for every bathroom and everyone’s sense of style, when they do work, they can really make a splash. If you’re not sure exactly what a vessel sink is or how one would fit into your bathroom’s decoration, read on. We’ll cover the basics of these sinks, how they differ from more traditional sinks, and how to tell if one is right for your home.

The Ins and Outs of Vessel Sinks

Most bathrooms are pretty basic when it comes to the layout of the sink: A basin is inserted into a countertop (and in many cases is an actual part of the countertop material), giving you a recessed area to wash your hands and do everything else that you need a sink for. They’re functional and usually more aesthetically pleasing than the metal sinks that are often seen in kitchens and utility areas. With that said, bathroom sinks don’t do much to stand out.

Vessel sinks serve the same purpose as a traditional basin sink, but do so with a much more stylish flair. Instead of being a recessed sink built into the countertop, vessel sinks are made of a standing vessel or sculpted bowl that typically sits on top of the counter or only partially recessed into it. This creates a unique look for the sink that calls to mind a sense of nostalgia for more Victorian-era hardware. The faucet typically stands separate from the vessel and is either mounted to the counter or to the wall, adding to the overall look and highlighting the difference between vessel sinks and traditional basins.

Vessel Sink Installation

Compared to some other plumbing jobs, vessel sink installation can be a bit easier, but may also be easier to mess up if you aren’t careful. Provided that you aren’t installing a semi-recessed vessel sink, the main concerns for installing the sink are the installation of the faucet hardware and making sure that the drain hole in the countertop is the right size to line up with the vessel drain. Theoretically, one of these sinks can be installed by a single person who has a good idea of what they are doing.

With that said, there are still a few things that need to be kept in mind during installation. The counter will need to be sufficiently large to accommodate the vessel and faucet, and made of a material that’s sufficiently protected against water, as vessel sinks are more prone to splashing than more traditional sinks. You will also need enough vertical height to accommodate the sink; even a modest vessel sink can add 6 inches or more to the height of the sink area, so you’ll need the necessary clearance for both that and the faucet hardware. Mounting and sealing the sink are also more important than with traditional sinks, as the last thing you want is for your vessel to leak around its drain and potentially weaken the countertop below it.

Are Vessel Sinks Right for You?

Vessel sinks can be very striking, giving a unique look to your bathroom that really catches the eye. They come in a range of different shapes and materials, letting you customize your sink to meet your personal design preferences. They also don’t necessarily require as large of a counter or support structure as more traditional sinks, so they can work well in some smaller bathrooms provided they’re properly mounted. Vertical space and splash considerations may create issues, however.


Sunday, January 16, 2022

Can I Reseed My Lawn in Winter?


Can I Reseed My Lawn in Winter?

Can I Reseed My Lawn in Winter?


Though a lot of people reseed their lawns in the spring, there are periods during the fall that are actually better for most grasses than spring seeding. Exactly when this seeding window is depends on both where you live and the type of grass that you’re putting seed down for. This may lead some people to believe that any time late in the year is ideal for reseeding a lawn prior to spring; unfortunately, that isn’t actually the case.

If you reseed your lawn at the wrong time of the year, there’s a good chance that you won’t get the results that you expect. If your grass is thinning or has otherwise been damaged, this can result in bald patches come spring that require a lot of work to correct. To avoid this, let’s look at when you should (and shouldn’t) reseed your lawn and why.

Why Reseeding in Fall Works

Depending on the seed that you’re using, the window for reseeding late in the year typically comes in the late summer to early fall. Most of the time, your existing grass is slowing down its growth in preparation for the winter. The soil is still warm, however, and winter frosts are still several weeks away. There’s also a decent chance that you’re still getting frequent enough rains to keep the soil moist and the leaves on your trees haven’t yet started falling in earnest.

So what is it about this time period that’s so perfect for reseeding a lawn? Because the soil is still warm and reasonably damp, your seeds will start germinating quickly. The surrounding grass isn’t growing as aggressively, though, so the germinating seeds will experience less competition for moisture and nutrients as they establish their roots. By the time the leaves fall, your new grass will already be getting established and will then receive extra protection throughout the winter and a burst of nutrients as those leaves decompose. It’s just about the best start that young grass could ask for.

Reseeding in the Winter

Unfortunately, the same situation doesn’t exist if you reseed in the winter. Even if you’ve had a fairly mild winter early on, colder winter nights will result in soil that is much cooler overall. Rain may also be less common depending on where you live, meaning you’ll have to supply more of your own moisture to the growing grass. Moist soil cools quicker, however, so the issue with the cold nights will become even more significant; it also creates an increased likelihood of frost, which can damage or kill fragile young grass.

Of course, these problems assume that your grass can germinate and start establishing itself at all. Average temperatures and the cycling through colder nights may cause the grass seed to not germinate, and the increased scarcity of food will make the seeds you spread much more appealing to birds and insects if you don’t keep the grass seed covered. The fallen leaves that provide protection to your seeds during a fall planting can actually create a barrier that keeps them out of the soil come winter as well. If winter has come and you need to reseed your lawn, you’re much better off waiting until early to mid-spring and reseeding then.

Options for Your Lawn

If your lawn has significant issues, there are still options available to you. You may be able to replace patches with sod, or look at alternative ground coverings that thrive in colder weather. A landscaping pro in your area should be able to discuss your various options with you and help you develop a plan for how to get the lawn you desire. HomeKeepr can help you find the professional to get your lawn fixed up; simply sign up for a free account to connect with pros in your area.


Wednesday, January 12, 2022

How to Hire an Interior Designer


How to Hire an Interior Designer

How to Hire an Interior Designer


When you think about the pros that are needed in and around your home, you likely think of contractors, roofers, plumbers, electricians, and a few other professionals. One option that might not cross your mind is an interior designer. This is a shame, really, because a good interior designer can take the look of your home to a completely new level.

Don’t confuse an interior designer with a simple decorator. Designers help arrange the decorations, yes, but they do so in such a way that it completely redesigns the look of your home’s interior. Interior designers typically have refined artistic sensibilities and put them to work for you in order to create a home that will leave visitors breathless when they first take it all in.

Do You Need an Interior Designer?

Some people think that interior design is easy enough that they don’t actually need to hire someone to get the job done. This usually results in homeowners who aren’t that happy with the way that their homes look, because even though they assumed it would be easy, they find that the end result doesn’t quite match what they initially had in mind. To make matters worse, that lackluster result usually costs a lot more than the homeowner expected. An interior designer can help avoid this outcome.

A good interior designer already has experience in helping rooms come together, and has a much better idea of costs going in. This can result in a much better overall result while keeping the project budget in an acceptable range. As an added bonus, a good interior designer may have ideas and suggestions that you might not have even considered on your own. This could leave you with an interior that you’re even happier with than if you’d just realized your original dream.

Questions to Ask

When talking to an interior designer, there are a number of questions you should ask to make sure that they are a good fit for your needs. Some of these questions will relate directly to the job at hand; if your home has unique features, unusual colors, or materials that are difficult to work with, you’ll obviously want to know if your chosen designer has the necessary experience to deal with these issues that are specific to your home. Beyond these situation-specific questions, though, there are other things you’ll want to ask about as well.

To get a feel for how the interior designer works and what is important to their creative process, ask questions about their style and any specific elements that they try to incorporate more than others. You might also ask what they find most challenging about their work, and ask for examples of problems they’ve run into along with what they did to fix things. Try to get a feel for what they look for in their dream projects. Questions like these will help you gain a better understanding of how they work and how likely it is that they’ll match with your own goals and desires for your home.

Finding Your Interior Designer

As you search for an interior designer, asking questions will definitely help you when sorting through your options and trying to find the designer that’s the best fit for your home and your budget. Don’t assume that you have to go with the first interior designer that fits within your budget; finding a designer with an understanding of your personal style and an approach that’s close to what you’d like for your home will make a big difference in how close the end result is to what you’ve envisioned.


Sunday, January 9, 2022

Shining a Light on LED Upgrades

 Shining a Light on LED Upgrades

Shining a Light on LED Upgrades


In these, the darkest days of the year, there’s nothing more important than adequate lighting. Unfortunately, firing up those incandescent bulbs costs money, and the more hours they run, the more they cost. Although change can be hard, today’s LED bulbs are better than ever, mimicking traditional bulbs in almost every way but with significant benefits to homeowners who make the switch.

LEDs Are Much Safer in Homes

Incandescent bulbs get hot. Sometimes they get very hot, especially when in enclosures like ceiling can fixtures. There are endless stories about recessed lighting catching fire because the wrong wattage bulb was put in by a homeowner in an attempt to brighten their space a little. That 100-watt incandescent bulb generates significantly more heat than a 40-watt or even 60-watt bulb.

LED bulbs, on the other hand, barely generate any heat at all no matter how bright they are or what color they put out. There’s almost no risk of fire due to overheating, making them super safe to leave running without supervision, even in a can light. Even better, LED recessed lighting kits are now available that replace the old can light housings, further reducing risk with upgraded construction.

LEDs Offer Additional Features

Incandescent bulbs are really good at making light, but they’re kind of a one-trick pony. LED lights, on the other hand, are super versatile. They can have built-in speakers for music on demand in rooms like bathrooms or on covered patios where it may be awkward to keep a stereo or smart speaker. They can also be smart themselves, allowing you to change the color of the bulb based on your needs. If you’re in the mood for a blue light in your kitchen, well, just a few clicks on your phone and it’s done. If you’d rather stick to whites, but like to flip between blue hue light and yellow hue light as the day progresses, you can do that, too. You can even turn a smart bulb on and off without installing a smart switch.

Energy Consumption: Plain LEDs Versus Incandescent Bulbs

The other thing that LED bulbs do is they save money and energy, and in a huge way. It might not seem like much, but running a 60-watt incandescent light bulb five hours a day adds up to about $11 a year in energy expenses – if your house has 30 light bulbs, that’s $330 a year! That incandescent bulb is rated for about a 1,000 hour lifespan, so if you only use them five hours a day, you’ll be replacing them every six months, on top of the $330 extra you’ll spend on energy. For people who work from home and may have lighting on all day, 16 hours a day, the cost of running a single incandescent bulb shoots up to $35 yearly, with a bulb change every couple of months. The electricity cost alone for those 30 bulbs is over $1,000!

LEDs, on the other hand, cost only a fraction of an incandescent bulb to run and last a whole lot longer. At five hours a day, a 10-watt LED bulb (equivalent to a 60-watt incandescent) will cost you $1.83 a year to run, and last five and a half YEARS. Even with 16 hours a day of use, that 10-watt LED is still only $5.84 to run; 30 of them will cost $175 yearly. And they’ll still last most of two years (1.71 years, to be exact).

Ready to Upgrade Your Lighting?

Although changing out incandescent bulbs for LEDs is something a homeowner can easily do, you may still want some help choosing smart bulbs or rewiring old can lights into sleek, modern recessed LED lights. 


Wednesday, January 5, 2022

Tips for Painting Over Dark Walls


Tips for Painting Over Dark Walls

Tips for Painting Over Dark Walls


Hooboy. You’ve finally bought a house, but the paint is so, so dark. “It’s only paint,” you told yourself as you walked through the place, and repeated at your walkthrough prior to closing. “It’s only paint.” And while it’s true that it’s only paint, and paint can always be painted over, going over dark walls is a much different story than trying to paint over light colored walls. Reds, purples, browns, and dark grays are particularly tricky, though anything with much pigment can pose a significant challenge if you’re not prepared. But don’t worry, we’ve put our best painting tips together to help you conquer your dark wall challenges.

Tip #1: Primer Is Not Optional

It can be easy to scoff at basic prep work when you’re “just painting,” but as with any project in your home, the end result is going to be directly related to how well you do the prep work ahead of time. And just like laying new tile or installing a new bathroom sink, the amount of preparation time you put into repainting your dark walls will show. The right prep also will make the job so much easier, so that’s something to look forward to.

When painting over dark walls, primer is absolutely not optional. Even if you choose a paint that claims to have a primer built in (it does not, it’s just a thicker paint), you will still need a high quality primer. This is not time to skimp on the cheap stuff. Choose a primer that’s designed specifically to block pigment bleeding. The greater the color difference between the paint that’s being covered and the paint you’re covering with, the more your primer will have to do. Plan to paint at least two coats of primer on very dark walls.

Tip #2: Choose Colors in the Same Family

If you like the color that your wall already is, but it’s just a shade or two too dark, well, that’s a much easier problem to solve than going from, say, midnight black to snowfall white. Taming the shade is a much easier proposition, since you’re staying in the same color family, and any small amount of pigment bleed may easily go unnoticed. However, you’ll still need to stay close to the same shade, or else you’ll need to go back to Tip 1 and prime like your life depends on it. You should still prime before you paint no matter what you do, but you may not need industrial strength primer to switch from a deep burgundy to a middling plum, for example.

Tip #3: Paint More Than You Think You Should

One of the biggest mistakes homeowners make when applying new wall paint, besides skipping the primer, is stopping before they’re done. With some colors, it can be a little tricky to tell if you’ve actually finished the job, but if you see any thin areas at all, you should really apply another coat. Chances are good that you didn’t just have one thin spot.

Two coats are often plenty of paint for a regular job, but don’t be shy about applying a third if it’s warranted, or going back later and adding another coat of paint after you’ve lived with it a while and noticed that the paint coverage isn’t really consistent. It’s easy to underpaint a wall, especially if you’re trying to get a job done over a weekend.

Or, Leave the Painting to a Pro…

If you’re not sure you’re up to painting over your dark walls, or you simply want to make sure the job is a one-and-done, you may need to call in a pro. Professional painters can help you choose colors that will look great in your home, as well as applying a finish that you’ll love for years to come. 


Sunday, January 2, 2022

Choosing a Walkway Deicer

Choosing a Walkway Deicer


Choosing a Walkway Deicer

As the threat of winter ice and snow increases, many homeowners start stocking up on deicer and other products to try and keep their walkways safe and clear throughout the winter. Not all deicer products are created equal, however, and some can actually do some harm around the home. Not only can some deicing compounds harm plants around your walkway, but they can even cause some damage to your walkways as well if you aren’t careful.

Obviously, damage to your lawn or property isn’t ideal when trying to use a product to keep yourself and your family safe during the winter. With several options available, how do you know which deicer is best for your home? While it may differ based on the composition of specific deicer products, here are some things that you can look for to help choose the right deicer for your walkways.

Avoiding Harmful Compounds

When people think of deicer, one of the first things that they think of is rock salt. It’s the most common deicing compound and has been around for decades, but it’s also the most dangerous to both your walkways and your yard. Rock salt is made of sodium chloride, abbreviated as NaCl, so if you see this on a deicer product you’re considering then you’re probably better off picking something else. Don’t pick just anything, though; some deicers use potassium chloride (abbreviated KCl) instead of sodium chloride, but this can also cause damage and even inhibit the root growth of plants in the spring.

There are a few options out there that are much better for your property than rock salt or potassium chloride. One of these is calcium chloride, also abbreviated as CaCl2, which not only is effective at lower temperatures than rock salt, but also gives off heat as it melts the ice, so it performs better as well. Urea-based deicers, which are made from ammonia, are also useful and are less likely to damage plants than many other compounds. Calcium magnesium acetate, also known as CMA, can also be used and is significantly less damaging than most other deicers because it is free of any form of salt.

Reducing Deicer Damage

If you do have to use a deicer that is potentially damaging to your walkways or plants, you have some options to help you reduce the damage that’s done. Mix the deicer with an inert compound such as sand or cat litter before spreading it, as this will provide traction and reduce the overall amount of deicer that you have to use. Use a mechanical spreader as well instead of just tossing the deicer out by hand to ensure a more even application that will keep large concentrations of salt or other chemicals from being deposited in one location. If you have advance warning before snow or ice hit, you can also cover portions of your steps or walkways with plastic, cardboard, or old towels or rugs; once the winter weather has passed, you can pick these items up and reveal mostly ice-free surfaces beneath them to greatly reduce your dependence on deicer.

Preparing for Winter Weather

Once the worst of winter hits, it’s usually too late to go out and try to buy deicer; many places start running low once winter weather starts showing on the radar. To avoid this, it’s important to stock up on at least a little deicer and other winter prep items well in advance of the bad weather actually arriving. There’s more to getting ready for winter than just keeping deicer and some basic supplies on hand, though.

Take the time to get winter prep inspections done of your HVAC system, roof, and other critical parts of your home done while the weather is still mild. This can help you avoid costly repairs and potentially dangerous situations once you’re in the middle of winter.